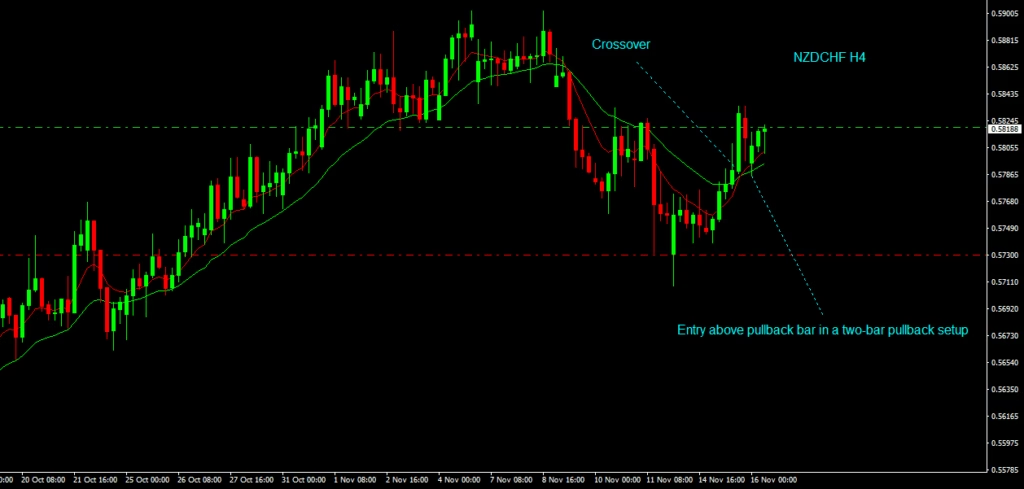
TL;DR: EMA ribbon trend strategy — use a ribbon of short-to-medium EMAs (for example 8/13/21/34/55) to define the trend and dynamic support/resistance. Trade pullbacks to the ribbon in the direction of the ribbon slope: enter on clean rejection or a confirmation candle, place SL beyond the recent swing or ribbon band, size risk 0.5%–1%, and manage TP with fixed R:R, structural targets, or ATR-based trailing. This method favors trends and reduces false-break noise if combined with multi-timeframe confirmation.

Table of Contents
1. Introduction
EMA ribbons (a series of EMAs plotted together) help visualize trend strength, momentum and dynamic support/resistance. Community-tested approaches use a ribbon to (1) filter trade direction, (2) spot pullback entry zones, and (3) manage exits. This article provides a compact, rule-based EMA ribbon trend system suitable for intraday and swing trading on liquid instruments.
2. Strategy overview
- Instrument: FX majors, index futures (ES/NQ), and liquid CFDs.
- Primary TFs: H1 / H4 for bias; M15–H1 for entries.
- EMA ribbon example: EMA 8, 13, 21, 34, 55 (adjust per instrument).
- Core idea: Trade in the ribbon direction (ribbons stacked and sloping) and enter on pullbacks that test the ribbon region and show price-action rejection or structural confirmation.
Download Target Indicator and apply the settings in this strategy to reproduce the signals.
3. Setup
- Add EMAs: 8, 13, 21, 34, 55 (or similar Fibonacci-ish set). Use H4/H1 to confirm ribbon slope and trend quality; use M15/H1 to time entries.
- Optional: include ATR(14) to size stops and a simple volume/tick check for conviction.
- Mark recent higher-TF swings and important S/R to avoid entries into congested zones.
4. Trading rules
4.1 Filter / Bias
- Bullish bias: EMAs stacked ascending (8 above 13 above 21 etc.) and ribbon slope upward on the bias TF (H1/H4).
- Bearish bias: EMAs stacked descending and ribbon slope downward.
- If the ribbon is flat or EMAs are mixed, do not take ribbon pullback trades.
4.2 Signal
- Valid setups are pullbacks that touch or slightly penetrate the ribbon followed by a clear rejection candle (pin, engulfing, or strong-bodied candle back in direction of trend) or a structure reclaim (higher-low in an uptrend).
- Ideally the pullback occurs above/below the middle of the ribbon (not deep through the entire ribbon), preserving room for a favorable R:R.
4.3 Entry
- Conservative: enter on the close of a confirmation candle that rejects the ribbon (market entry).
- Aggressive: place a limit order slightly inside the ribbon near the price that first touches the ribbon for tighter entries.
- Alternatively, use a stop entry beyond the high/low of the confirmation candle to catch momentum continuation.
4.4 Stop-loss
- Place SL beyond the recent swing low (for longs) or beyond the ribbon extremes if price breaches the ribbon significantly.
- Use ATR(14) to set a minimum stop distance (e.g., 0.8–1.5× ATR) to avoid noise. If SL becomes too wide for your risk percentage, skip the trade.
4.5 Take-profit & Trade Management
- Option A — Fixed R:R: initial TP at 1:1 or 1:2 depending on ribbon touch depth; move SL to breakeven after partial target.
- Option B — Structural: aim for the next higher-timeframe pivot or swing high/low.
- Option C — Trail: use ATR-based trailing or exit when price crosses back through the ribbon in the opposite direction.
4.6 Invalidation
- Invalidate trade if the ribbon flips (EMAs cross and stack reverses) on the higher TF, if price decisively closes through the ribbon without retest, or if a major scheduled event distorts execution.
5. Position sizing & Risk Management
- Risk per trade: 0.5%–1% of account equity. Compute lot size from SL distance.
- Cap concurrent ribbon trades (e.g., 1–3) and stop trading after a daily drawdown threshold.
- Reduce size when trading larger TFs with wider SLs, and never increase risk to force a trade.
6. Backtest & Validation
- Backtest the ribbon rules across instruments and TFs. Record number of trades, win rate, average R:R, expectancy, and max drawdown.
- Test variations: different EMA sets (5/8/13/21/34 vs 8/13/21/34/55), entry types (limit vs market), and ATR multipliers for stops. Use walk-forward testing to avoid overfitting.
7. When NOT to trade
- When the ribbon is flat/choppy (mixed EMAs) — no clear trend.
- During thin-liquidity sessions or around major news.
- When pullbacks penetrate deeply through the ribbon and invalidate the dynamic support/resistance concept.
8. Variations & Optimizations
- Ribbon + MA filter: require price above a slower EMA (e.g., 200 EMA on H4) for higher-confidence trend trades.
- Ribbon squeeze: look for ribbon compression followed by expansion as a signal of emerging trend (useful for breakouts).
- Volume/tick confirmation: require average or above-average tick activity on the confirmation candle to reduce false entries.
- Multi-timeframe rule: require ribbon alignment on H4 and H1 for longer trades; allow H1/M15 alignment for intraday scalps.
9. Pre-trade checklist
- H4/H1 ribbon stacked and sloping in trade direction.
- Pullback tested the ribbon (or minor extension into ribbon) and produced rejection.
- SL, TP and lot size calculated (risk ≤ chosen %).
- ATR and volume check done; no imminent news.
- Session liquidity and spreads acceptable.
10. Conclusion
EMA ribbons provide a clear visual filter for trend-following strategies. By trading pullbacks to a sloping ribbon and enforcing strict stop placement and position sizing (ATR-based), traders can capture high-probability trend continuations while avoiding noisy chop. Validate parameters per instrument and stick to the pre-trade checklist.
11. FAQ
Q: Which EMA set is best for the ribbon?
A: There is no single best set — common, effective sets include 8/13/21/34/55 or 5/8/13/21/34. Choose a set that reflects your timeframe and test it.
Q: Can ribbon entries be automated?
A: Yes — define mechanical rules for ribbon slope, touch depth, confirmation candle, and ATR-based SL/TP; then implement as an EA with proper error handling.

