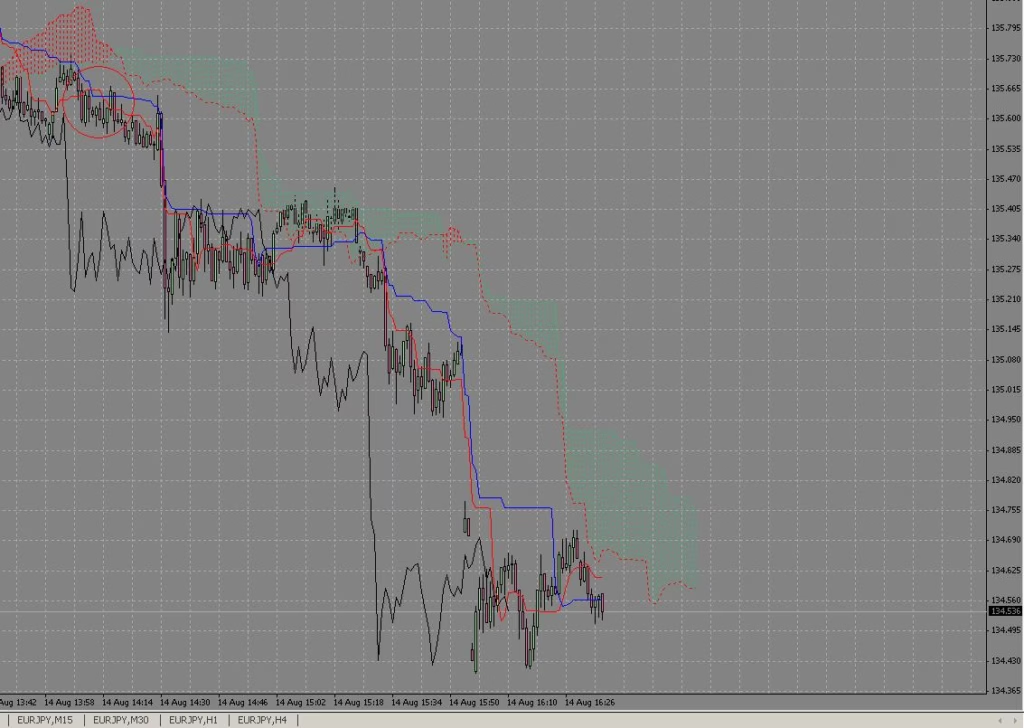
TL;DR: Ichimoku trading strategy — use Ichimoku cloud components (Tenkan, Kijun, Senkou Span A/B) to define trend and structure. Trade trend-following cloud breaks (price closes beyond Kumo) and reclaim/retest setups (price returns to Kumo or Kijun and confirms), or trade pullbacks within the cloud when higher-TF alignment is strong. Place SL beyond Kumo extremes or recent swings, target fixed R:R or next higher-timeframe level, and size risk to 0.5%–1% equity.

Table of Contents
1. Introduction
Ichimoku Kinko Hyo is a multi-component system useful for quickly identifying trend, support/resistance, and momentum. Community-tested variants on ForexFactory commonly combine cloud breaks, Tenkan/Kijun cross confirmation, and reclaim/pullback entries. This article distills those community practices into a compact, operational Ichimoku strategy suitable for intraday and swing contexts.
2. Strategy overview — Ichimoku trading strategy summary
- Instrument: FX majors, index futures (e.g., NQ, ES), and liquid stocks.
- Primary TFs: H1/H4 for trade selection; M15–H1 for execution depending on style.
- Core idea: use cloud (Kumo) breaks and Tenkan/Kijun structure as trend filter; prefer trades that align with multi-timeframe Ichimoku signals (price relative to Kumo, Tenkan/Kijun relationship, Chikou Span confirmation).
Download Target Indicator and apply the settings in this strategy to reproduce the signals.
3. Setup
- Add standard Ichimoku (default settings 9, 26, 52). Display Kumo (Senkou A/B), Tenkan-sen and Kijun-sen, and Chikou Span.
- Use H4/H1 to identify dominant trend (price above Kumo on H4 = bullish bias). Use M15–H1 to time entries.
- Keep a simple volatility/ATR read to size SL and avoid very thin markets.
4. Trading rules
4.1 Filter / Bias
- Bullish bias when price > Kumo on higher TF and Chikou Span clears price and Kumo.
- Bearish bias when price < Kumo and Chikou Span confirms below.
- If higher TF is inside Kumo or mixed, treat signals as lower-probability and reduce size.
4.2 Signal (quality Ichimoku signals)
- Cloud break + Tenkan/Kijun alignment: price closes beyond Kumo and Tenkan is above Kijun (for longs).
- Reclaim / retest: price breaks Kumo, then returns to touch/test Kumo or Kijun and shows rejection — high-probability entry.
- Kijun bounce: price pulls back to Kijun during trend and rejects (shorter entry variant).
- Chikou confirmation: Chikou Span not obstructed by price and supports the direction (adds conviction).
4.3 Entry
- Conservative: enter on confirmation candle close after reclaim/retest rejection on the execution TF.
- Aggressive: enter on immediate breakout candle close beyond Kumo if momentum is strong and TF alignment confirmed.
- For intraday scalps, use M15 entries; for swing entries use H1/H4 signals.
4.4 Stop-loss
- Place SL beyond the Kumo edge or beyond the recent swing low/high depending on which is tighter. Ensure SL fits your % risk rule — if SL is too wide, reduce position size or skip.
4.5 Take-profit & Trade Management
- Targets: fixed R:R (e.g., initial 1:1 → trail to 1:2), or structural targets (next H4 pivot, weekly high/low).
- Management: move SL to breakeven after partial target, trail using Kijun or ATR as trend evolves. Consider closing half at 1:1 and letting rest run.
4.6 Invalidation
- Invalidate if price decisively re-enters Kumo and closes through the SL zone without valid retest. Cancel pending orders ahead of major news or when spread/latency spike.
5. Position sizing & Risk Management
- Risk per trade: 0.5%–1% of equity. Compute lot size from SL distance.
- Limit concurrent Ichimoku trades (e.g., max 2–3). Pause trading after specified consecutive losses or daily drawdown.
6. Backtest & Validation
- Backtest H1/H4 cloud-break + reclaim rules across multiple pairs and sessions. Include realistic spreads and slippage. Track expectancy, win rate, avg R:R and max drawdown. Walk-forward test to confirm robustness.
7. When NOT to trade
- Avoid when higher TF is inside Kumo (no clear trend) or when Chikou Span is obstructed.
- Stay out during major news or thin-liquidity sessions.
- Avoid entries when Tenkan/Kijun are cross-choppy without clear direction.
8. Variations & Optimizations
- Tighter entry variant: use Kijun bounces for quicker entries with smaller SLs.
- Cloud break + HA filter: require Heiken Ashi confirmation for cleaner momentum.
- Renko + Ichimoku: many community threads show Renko + Ichimoku for noise reduction.
- Custom TF mix: some traders use Ichimoku on H4/D1 for bias and M15 for entries — test which mix works best for your instrument.
9. Pre-trade checklist
- H4/H1 trend (price vs Kumo) checked.
- Tenkan/Kijun alignment confirmed.
- Chikou Span unobstructed (adds conviction).
- Entry candle/retest confirmation on execution TF.
- SL, TP and lot size calculated (risk ≤ 1%).
- No imminent news and spreads acceptable.
10. Conclusion
A disciplined Ichimoku trading strategy blends cloud-based trend identification with reclaim and Kijun-based entries. The system is visually intuitive and effective when combined with multi-timeframe confirmation, proper SL placement, and conservative risk control. Backtest across instruments and apply strict entry validation before scaling.
11. FAQ
Q: Should I change Ichimoku settings?
A: Standard 9,26,52 is a solid default. Some traders tweak to local market characteristics (e.g., 9,16,52 or 8,21,89) — always backtest any change.
Q: How important is Chikou Span?
A: Chikou helps confirm that the current price action is not obstructed by past price — it’s a useful filter but not mandatory if other conditions are strong.

